Just because you drive a classic car, it doesn’t mean you don’t stay up to date with your music choices.
And if you’re blasting hyperpop or modern classical, you can bet it’s not on a tape deck. Even those with a taste for the golden oldies have moved over to digital, so most of our music is on our cellphones.
Whilst new-to-market double din head units often have Bluetooth capability, you may not want to ruin the classic look with a space-age screen on the dash.
Or maybe you’re just looking for a cheap fix to get your music – an aux input won’t stretch your budget beyond a few bucks.
Installing an Aux input to your car stereo is an achievable DIY car task for anyone – so roll up your sleeves and let’s get to work.
5 Methods and Everything Needed to Install Aux Input to Your Car Stereo
Tools You Might Need To Install An Aux-In Port or Jack To Your Car Stereo:
- Soldering Iron & Solder
- Wire cutters or strippers
- Drill or Dremel
- Sockets, screwdrivers, pliers for access behind the dashboard
- Multimeter if you don’t have a manufacturer schematic for your AUX port
Materials To Get The Job Done:
- Speaker wire (usually around 2-3ft)
- Electrical tape or liquid electrical tape
- 3.5mm Audio Jack
- Or a 3.5mm Aux port
- Possibly a Mono-to-Stereo adapter as some old head-units are limited to one channel
Input Options:
Before undertaking the installation of an AUX input to your car stereo, you need to consider the input you want. You have two options: the male 3.5mm “male” jack which connects directly to your phone’s headphone port, or the “female” aux port itself – giving you more options of what you’re plugging in.
The installation process is largely identical whether you’re opting for a jack or a port – but it will determine how you can hook your phone up in future.
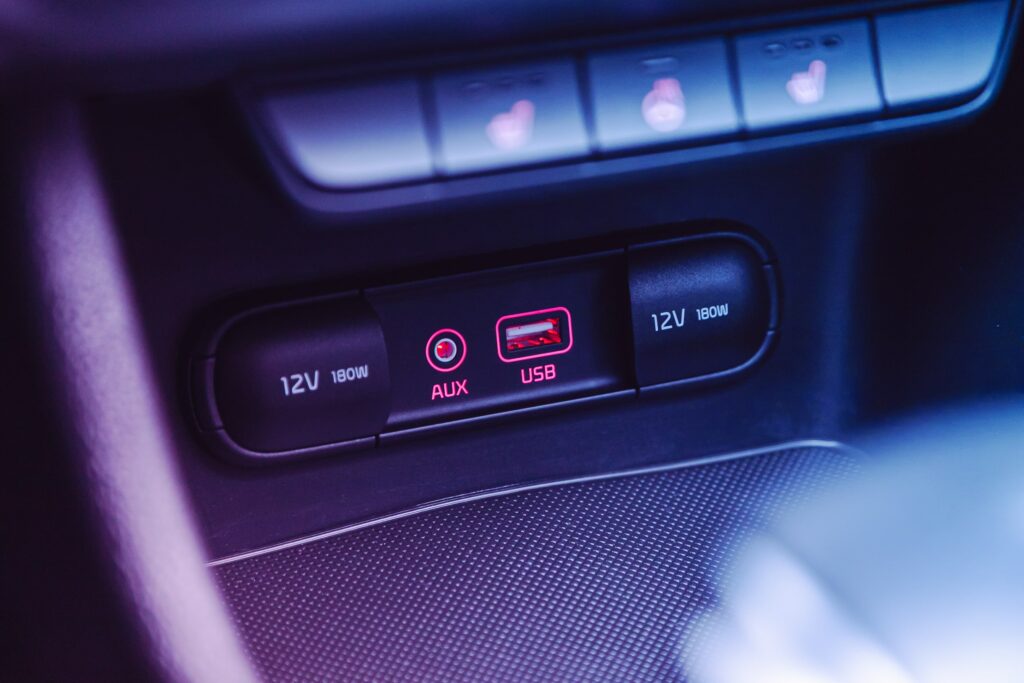
AUX Input Jack
You can buy aux input jacks with the wiring for a few bucks at any electrical goods store. This unit contains the 3.5mm jack that connects to the input port on your phone or iPod, and lets you hook your device directly to the car stereo.
Having an input jack in your vehicle is handy because it means you can plug in directly to the dash: no additional attachments required. However, you’ll only have one jack and no way of attaching additional devices to your stereo.
AUX-In Port
The aux-in port is the “female” port, into which plugs the 3.5mm jack. You can install a port directly into your dash, and then use a 3.5mm jack to hook your phone up.
They’re equally cheap and similar to setup. With an aux-in port on your dash, you’ll need an additional cable to connect your music-playing device. But this also gives you the option of adding dual headphone jack outputs to connect more devices or headphones for the passenger and the driver.
So are you jacked to learn about installing an aux input to your car stereo? Then let’s get started.
How to Install an AUX Input to Your Car Stereo – 5 Methods
Method 1: With A Bespoke Adaptor Cable
Before we start dismantling the dash, it’s worth asking if there’s an easier way.
A lot of popular brands actually have aux input cable adaptors, built to work with their car stereos.
These adaptors simply plug in behind the dash – and they save you doing a lot of soldering in the process. But of course, they’re a little more expensive than going the DIY-way, and personally, I’m always a little disappointed to go a day without soldering.
Nevertheless, they’re a decent option if you don’t have the tools. Although the process may vary a little depending on your vehicle and the head unit, it tends to stay pretty simple. Here’s how to install an adaptor cable:
- First, pop the hood and disconnect the negative battery terminal. This ensures there’s no electrical charge in any of the vehicle’s electrics, and it’ll save you from getting a shock.
- Then open up the dashboard and remove the stereo.
- Drill a small hole for the aux port in your dashboard.
- Plug the connector into the stereo, and then run the cable to the hole you drilled.
- Reconnect the stereo to the vehicle and replace it in the dashboard.
- Reconnect the battery and turn on the ignition. You’re ready to plug in and play.
Method 2: If Your Stereo Has RCA Inputs…
If your car stereo has RCA inputs, I’ve got good news and bad news. The good news is you’re in for an easy installation, but the bad news is that the soldering iron goes away… for now.
RCA connectors are found on sound system amplifiers to enable input and output, and occasionally a car stereo manufacturer has built them into the stereo. If your car stereo has these inputs, you’ll be able to plug in an RCA to 3.5mm adaptor.
You may not even need to dismantle the dashboard. Here’s how to install an aux input if your stereo has RCA inputs:
- Remove your car stereo and check the back for RCA inputs.
- Plug the connectors into the correct channels – these are usually color-coded, so the red connector will go to the red port (that’s the right channel) whilst white will go to white (the left channel).
- Run the cable through your dash until you can access the 3.5mm jack at the end from the cab. Top tip: since you’ve got a 3.5mm jack and not a port, you won’t even need to drill a hole for it and you can run it into your glove box through the space at the back.
- Return the stereo to the dashboard, switch the ignition and select AUX on the head unit to get the music going.
Method 3: If Your Car Stereo Has An XM Radio Capabilities
If your vehicle has XM radio capabilities, you can port an aux input onto the XM module. All you’re going to need is an aux port and some wires to solder them together.
Unfortunately, if you want to keep XM radio in your vehicle, you’ll need to splice the connections together – this can result in XM signal bleeding into your music when you’re using the aux input at low volumes.
But if you don’t mind ditching XM altogether (not everyone wants to pay up for XM radio) then you can disable the XM signal entirely, and you won’t have any bleed.
Here’s how to install an aux input onto an XM module:
- We’re going to start with disconnecting the battery as you’re getting up close and personal with your vehicle’s electronics.
- Now take your aux-in port. You’ll need to solder the wiring to the port. The aux-in port has three terminals, for signal 1, signal 2 and ground. Solder and seal your wiring to the port.
- Now to the vehicle: detach the glovebox to find the XM module to the right side. On the left of the XM module is the plug, which you can remove once you release the locking mechanism.
- Once you have the location of the plug – where you’ll solder the other wires – you can choose a place on your dash for the aux-in port. Drill or Dremel a small hole for your port and measure out the wire you’ll need, cutting the excess.
- You’re ready to connect the tail end of the wiring to the plug at your XM module. Splice the new wiring onto the existing wiring at the plug. Signal one will attach to the green and white wire, signal two splices to the brown and white wire, and ground is connected to the black and white wire on the bottom left of the plug.
See the diagram below for a schematic of the connections.
- To avoid any bleed of the XM radio signal into the aux signal, you can remove the yellow-highlighted wires entirely at the cost of disconnecting the XM. If you want to keep XM signal available in your vehicle, splice the new wiring and keep the highlighted wires.
- You’re good to go: you can rebuild the dashboard, plug your smartphone in, and, using the XM1 channel on your head unit, play music through the aux-in!
Method 4: Install An Aux Input Jack To A CD Changer
If you’d like a 3.5mm jack on your dash so you can plug directly into the head unit, then you can use this method to attach a jack to your CD changer. Let’s see how it’s done.
- Since we’re working with the electronics of the vehicle, begin by disconnecting the battery.
- Now remove the stereo from the dash and find the pinout of the CD changer. It’ll look something like the below diagram – take note of the pin for ground and left and right channels.
You may need a manufacturer schematic for your stereo to identify the correct pins.
- Your 3.5mm jack will have three wires – black, red, and white (or sometimes yellow). Remember:
- Black = ground
- Red = right
- White/yellow = left
- Time to solder, soldier! Connect the black wire to the ground pin, the red wire to the right pin, and the white or yellow wire to the left pin.
- Now you can run the wiring through your dash and mount the jack. If you’d like it fixed, then drill a small hole in the dash to mount the jack in – or simply leave the jack loose with enough length in the wire to reach wherever you keep your phone while you drive.
Method 5: Installing An Aux Port In AM or AM/FM Radios
With a lot of really classic old vehicles, you won’t even have a CD changer to work with, let alone an XM module. But as long as there’s an AM radio, you can hook an aux port up.
- We’ll be soldering the aux port wiring to your AM radio – so to begin with it’s important you disconnect the battery. We want fire beats, not a fire hazard.
- Remove the head unit from your dash. Every old vehicle is different and often the radio won’t be easily accessed – use a quality service manual for your vehicle.
- You need to find the potentiometer – or pot for short – on your head unit. This is usually a cylindrical component, mounted to a circuit board. It’ll have a range of wires connecting it to the turning knobs of your stereo.
- Once you’ve identified the pot, you need to figure out which terminals are input, output, and ground.
Again, a wiring schematic from your stereo manufacturer will be helpful here, but in the absence of such a schematic you can usually trust that the bottom terminal is input, the middle terminal is output and the top terminal is ground.
- Now you can connect your aux-in port. Solder the connections like so:
- Input on the pot connects to the terminal on the aux-in port that takes power.
- Connect the ground terminal on the pot to the ground terminal on the aux-in port.
- And the remaining terminal on the aux-in port can be connected to the output terminal on the pot.
And if you don’t have the manufacturer’s schematic for your aux-in port, use a multimeter to identify which pin on the aux-in port is which.
- You can now return the head unit to the dash and assemble the dashboard. The car radio will function as normal, but when you plug a smartphone or mp3 player into the aux-in port, it will override the radio and play tunes of your choice.
If your car radio stereo is mono, you’ll also need a mono to stereo adaptor. These will set you back a few bucks and fit into the aux-in port.
My Hacks For A Smooth Installation
I’ve installed plenty of aux inputs and honestly, it hasn’t always gone smoothly. Here’s what I wish I knew before getting started.
Use Liquid Electrical Tape
You should seal your fittings with electrical tape to insulate the wiring – but using standard electrical tape often leaves a bulky mess. Aside from being unsightly, it might not fit neatly behind your dash.
However, a couple of drops of liquid electrical tape can insulate your wires neatly, and it won’t crack or wear over time.
Stash Your Aux Input In The Glovebox
Although a lot of people choose to place their aux input port by the car stereo – and I’ll admit this is great for ease of access – don’t forget you can get creative about where you put it.
If you’re looking to preserve the classic look of your dash, then you can hide the aux input in the glovebox. Or repurpose the ashtray of an old-school vehicle for your aux input. I find that hiding the aux port gives the car a Double-0 Seven feel – shaken, not stirred.
Double Check Before You Drill
You’re probably nervous about drilling a hole in your car’s dashboard – and rightly so. While there should be space for an aux input behind any little piece of plastic, it pays to double-check that there’s no wiring behind the panel you intend to install your port into.
First, tap the panel to check that it’s hollow behind – you’ll hear the vacant echoey tap if it is. Then you can pry the panel off to ensure there are no essential wires sitting in the way of your drill bit.
Wrapping Up
Whether you’re a mechanical maestro or a DIY beginner, installing an aux input to your car stereo is a job anyone can do.
And you can turn any classic vehicle into a pop-music powerhouse in an afternoon with the right tools.
Working on your own vehicle is always rewarding – and by installing an aux input you’ll get a peek behind the dash.
Car mechanics can be aux-hilarating! Get ready to plug in and play!